Showing posts with label mason jar. Show all posts

Wednesday, August 7, 2013

Coconut Milk Salted Caramel


I love when failures turn into sweet and salty success. Sometimes, I make things on a whim. I originally went to make coconut milk whipped cream but didn't prepare by putting the coconut milk in the fridge overnight. So my coconut milk whipped cream just stayed as coconut milk. I didn't want to waste it and needed a topping for my cupcakes and that's how this became one of the best vegan dessert topping ever and a staple in our house.

1 Can Coconut Milk 
1/2 Cup Coconut Palm Sugar
1 TSP Sea Salt
2 TSP Vanilla

In a small saucepan, over low heat, add your ingredients. Slowly raise the heat...slooooowly....
It will start to bubble and then lower heat and let simmer.
Keep stirring and stand close. Do not let your sugar burn!
Let simmer until it has reached your desired thickness.
Remove from heat and drizzle over your favorite desserts or eat it straight from the jar!
Store in a mason jar and keep in the fridge.


I love when failures turn into sweet and salty success! 

Wednesday, April 3, 2013

Sriracha Salt


Yes, you read that right...Sriracha salt. 
I think I might put sriracha on just about everything. For all the sriracha fans out there, you know what I mean.. It really does go well with everything. I came across a picture of sriracha salt on instagram and immediately knew that I had to get my hands on some. After doing some googling, I found some online. I added it to my cart and hit check out. As I am pulling out my wallet I realize wait a second, I am about to pay $17.00 for salt. The frugal girl living inside me was smacking her head. I am so happy I didn't spend all that money because this super easy recipe costs about $1.00 to make. You can't really even compare that! Now go spend the $16.00 you saved on something special, like more sriracha. 

1/2 Cup Salt 
5 TBSP Sriracha

*I used coarse sea salt and it ended up being a little too coarse. Had to grind this down a bit more. I will be messing around more with different flavored salts so I will let you all know which kind works best! 

Option 1
Heat your oven to 200 degrees.
Line a baking sheet with parchment paper.
In a small bowl, mix the sriracha and salt until the salt is coated.
Spread out the salt on the baking sheet into a thin layer. It's okay if some overlaps but try and spread the  salt the best you can. 
Put the salt into the oven.
Turn off the oven. NOW! GO!
The salt can burn really easily.
Let the salt dry slowly in the oven but every few min take out and shake around so it doesn't stick or burn.
Store in an airtight container once dry.

Option 2
Line a baking sheet with parchment paper.
In a small bowl, mix the sriracha and salt until the salt is coated.
Spread out the salt on the baking sheet into a thin layer.
Let the salt dry uncovered for 1-2 days.
*We have cats, so this wasn't really an option for us!


Ain't she a beauty? 


Sunday, February 10, 2013

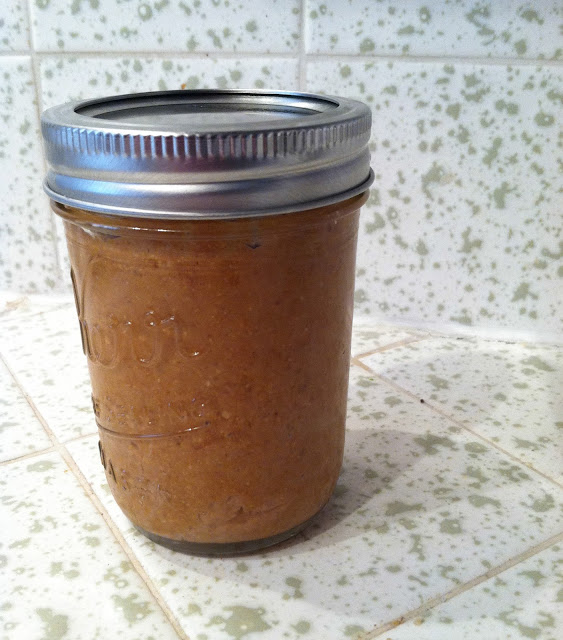
Toasted Cashew Butter


I try to grocery shop by what's on sale each week. I wait patiently every week until wednesday morning when I open my email, and see the new weekly sale flyer and do a little happy dance as I get to plan the weeks recipes. This week, cashews. For the first recipe, is this delicious Toasted Cashew Butter. This cashew nut butter is the perfect combination of sweet and salty. Toasting the cashews brings out their sweetness. They make your house smell heavenly too!

1 Cup Raw Cashews
1/4 TSP Sea Salt
1/4 Cinnamon 
3 TBSP Olive Oil

Preheat oven to 350 degrees. 
Spread cashews in a single layer on a baking sheet covered with parchment paper. 
Roast Cashews for 10 minutes, toss around at 5 mins.
Let the cashews cool (You can speed up the process by sticking them in the freezer for a few minutes)


In food processor, combine cooled cashews, sea salt, cinnamon and olive oil and blend until desired consistency. 

Friday, February 8, 2013

Pickled Red Onions


Out of all of the recipes on this blog, you HAVE to make these pickled red onions. Sometimes the most simple foods change your life. 3 ingredients is all it takes and your mouth will be thanking you for years. My fridge will always have a jar of these. We ran out yesterday and I made more yesterday. They are that amazing. Seriously though, I don't think you get it... Make these! 

1 Medium Red Onion
1 Cup Rice Vinegar
1 TSP sugar

Thinly slice red onion. 
Add onions to a medium bowl and pour in vinegar and sugar.
Make sure all of the onions are covered with the vinegar mixture. 
I usually put some plastic wrap over the onions and push it down so the onions stay submerged.
Put onions in your fridge for 3-4 hours.
Add onions to an airtight jar and store in fridge.

Put these onions on everything! Salad, sandwiches, soups, quesadillas, rice, veggies... everything.


Sunday, February 3, 2013

Zucchini Pickles


I love pickling things! For awhile our refrigerator was a sea of mason jars filled with different pickled vegetables and peppers. I have never met a vegetable that I didn't want to pickle. Pickling is a great way of making snacks ahead of time too because they last for weeks. These zucchini pickles are addicting and so easy to make. While these have a hint of asian flavor you can make these with all different vinegars and spices. Mix and make up new flavor combinations. You really can't go wrong when it comes to pickling. 

Zucchini Pickles
2 Zucchinis, Thinly Sliced
1 TSP salt
1 Cup Rice Vinegar
1/2 Jalapeño, Seeded and Minced
1 Clove Garlic, Minced
1/4 TSP Korean Crushed Red Pepper
1 TBSP Sugar

Wash and thinly slice the zucchinis. Put zucchinis in a medium bowl and add 1 TSP of salt. Mix the salt and zucchinis. Place zucchinis in the fridge for 20 minutes. The salt pulls out some of the moisture from the zucchinis. Drain the water and dry the zucchinis. 

Mix the brine by combining the rice vinegar, jalapeño, garlic, pepper, and sugar. Put the zucchinis into mason jars and pour brine over zucchini pickles. Store in the refrigerator. Enjoy xx


Saturday, February 2, 2013

Easy Homemade Vinaigrette


This vinaigrette recipe from The Kitchn is so easy and flavorful. It takes about 5 minutes with ingredients that I already had. Try and stock your pantry with a variety of oils and vinegars so you can mix up this dressing all the time. Be careful of certain vinegars because some of them may contain gluten. Malt vinegar is off limits. Make sure to read the labels and look out for rye, malt, wheat and barley. 

1/2 Cup Apple Cider Vinegar
1/2 Cup Olive Oil
3 Cloves Garlic, minced 
1 TBSP Dijon Mustard
1 TSP Honey
1/2 TSP Salt
1 TSP Pepper

Mix all ingredients into a bowl and whisk until combined. Pour into a small mason jar and store in the fridge. Enjoy! xx